Export fields to Excel is a new feature in Instafill.ai. One click from the Quick actions panel on any form details page, and you get a complete, structured list of every fillable field in that form as a downloadable .xlsx file. The same spreadsheet also works directly as a template for batch filling.
For many users, that first use case matters even more than batch filling. Before you can fill out a form, you often need to understand what information the form actually requires. The exported spreadsheet gives you that overview immediately. Instead of reading through the PDF section by section, you can see the full field structure in one place and understand what needs to be collected before you start.
Why this feature exists
A question we hear regularly, asked in different ways: “How do I know what information this form actually needs?” or “How do I get access to the fields?” It comes up when someone is working with a form for the first time, preparing data on behalf of a client, or trying to plan what to collect before a meeting.
It also comes up in a very practical workflow. Someone may already know which form they need, but they do not yet know which names, dates, IDs, percentages, checkboxes, policy details, or contact fields they will need in order to complete it. Before the form can be filled out, the information first has to be gathered. That is the job this export helps with.
The problem is straightforward. You can see that a form exists. You know it needs to be filled. But for a 15-page government application or a multi-section insurance form with hundreds of fields, figuring out exactly what data you need means scrolling through the entire PDF before you can prepare anything. And if something is missing halfway through, you start over.
That is why this feature is useful even when you are not doing batch work at all. The spreadsheet acts like a checklist for the form. You can review the field list up front, request missing information from a client, prepare supporting documents, and decide which parts of the form apply to the specific case before filling out anything.
With the exported spreadsheet, that picture is available immediately. You see every field the form requires – what to fill in, what to request from a client, and what you can skip for a given case – before you open the form, before you call anyone, before you assemble a single document. That’s the core reason this feature was built.
What was added
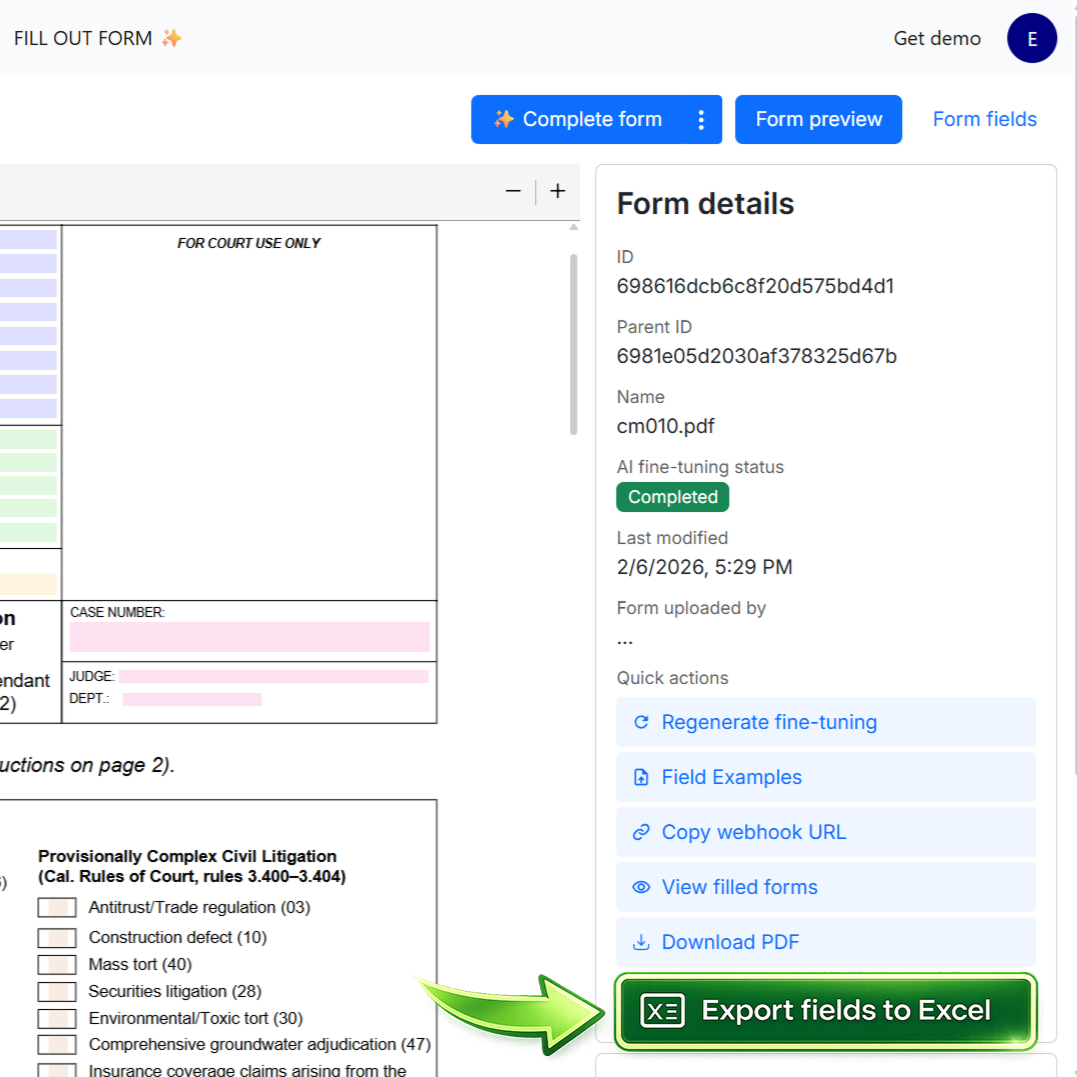
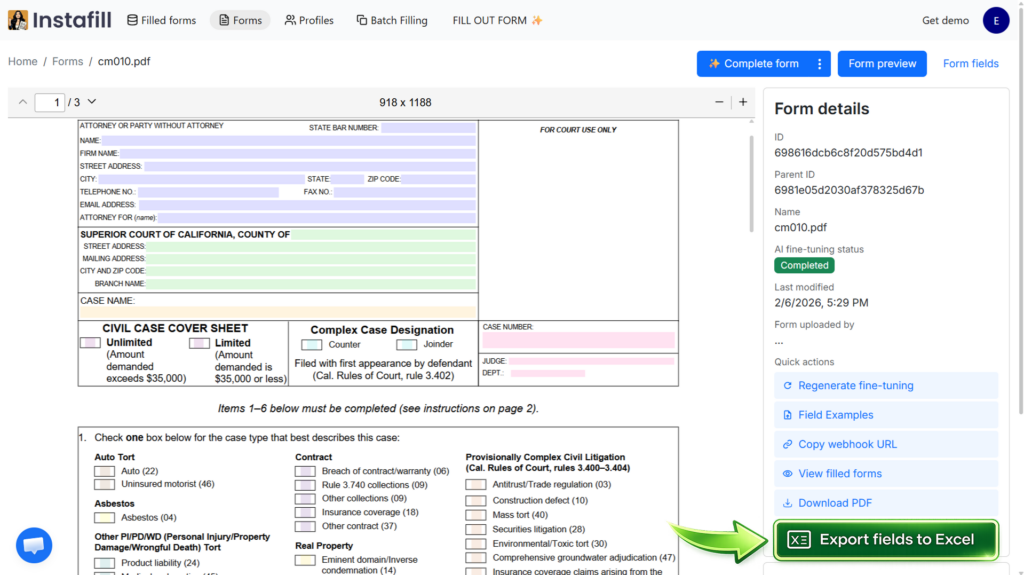
Every form in Instafill.ai now has an Export fields to Excel button in the Quick actions panel on the form details page. Click it, and a .xlsx file downloads with all field names as column headers in the first row. One field per column.
This means the file is readable both as a planning tool and as a working template. You can open it simply to understand the structure of the form, or you can start entering values into the same spreadsheet right away.
The column order follows the logical structure of the form. Fields that belong to the same group appear next to each other. Fields you have marked as “ignore” in Instafill.ai are not included. Column names are the exact internal field names from the form’s fine-tuning configuration – not display labels, not interpretations.
That exact naming matters in practice. On complex forms, the same display label may appear multiple times in different sections – for example “Name”, “Date”, “Amount”, or “Address”. The exported spreadsheet preserves the actual field structure from the form configuration, so you are looking at the same field list Instafill.ai uses when filling out the document.
How to use it
1. Open any form with completed fine-tuning and click “Export fields to Excel” in the Quick actions panel on the right side of the form details page.
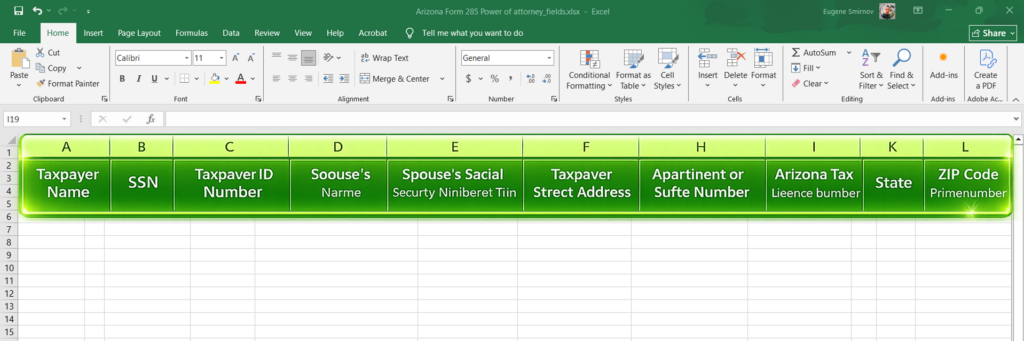
2. Open the downloaded .xlsx file. The first row contains all field names – one per column.
At this point, many users will simply review the spreadsheet before entering any data. That alone is often useful. You can scan the field list, identify what the form expects, and use it as a checklist for the information you still need to collect.
3. Fill in the columns you need. Type your data in the row below the headers. Leave columns empty for fields you don’t need to fill for this case.
This is especially helpful on forms where only a small subset of fields changes from one case to another. You do not need to think about the whole PDF every time. You focus only on the fields that matter for the current form run.
4. Use the spreadsheet as input. You can filter out empty columns in Excel, then copy and paste the populated cells as input when filling the form in Instafill.ai. The AI maps each value directly to the correct field using the exact column names – no interpretation step, no guessing between fields with similar labels.
In other words, the spreadsheet can serve two roles in the same workflow. First, it helps you understand what needs to be gathered. Then, once you have the data, it becomes a clean input format for filling out the form.
Technical note: Column names in the exported spreadsheet are the exact field names from the form’s fine-tuning configuration. This matters on complex forms where the same label – “Name”, “Date”, “Amount” – appears multiple times across different sections. Because the mapping is direct, the AI knows exactly which field you mean.
When it’s useful
Knowing what to collect before you start
Export the field list before you begin collecting data. You’ll know immediately what the form requires, what to request from a client, and what fields you can skip for a particular case. This is useful when working with a form for the first time or when preparing data on behalf of someone else.
That is the main reason many users ask for access to the fields in the first place. They are not always asking for a batch workflow. Often they simply want a clear list of what information the form needs so they can prepare properly before filling it out.
This is especially helpful in client-facing workflows. If you know the exact field structure up front, you can ask for the right information in one pass instead of sending multiple follow-ups after discovering new required fields later in the document.
Partial fills on large forms
Many forms have hundreds of fields, but for any given client or case, you only fill out a subset. A beneficiary change on a life insurance form might touch 15 fields out of 200. A phone number update on a government application might touch 3. With the spreadsheet, fill in only the columns that matter and filter out the rest. The AI receives only the fields that have values – it doesn’t have to process blank columns or guess which ones were intentionally left empty.
That makes the workflow easier to reason about. You are no longer looking at a full PDF and mentally tracking which sections apply and which do not. Instead, you work with a structured list and populate only the fields relevant to the current case.
Checkboxes, percentages, and structured data
Some forms have entire pages of checkboxes, percentage splits, or coded values – health questionnaires with 30 Yes/No fields, insurance forms with beneficiary percentage allocations, tax forms with multiple return type selections. Describing these in a text prompt is slow and error-prone. In a spreadsheet, each field is a column: type the value and move on.
This matters even more on forms where instructions like “on page 3, in section 2.1, choose No for all boxes in the first column” are possible but fragile. A spreadsheet is clearer. Each checkbox or percentage field has its own place, so the intended values are explicit.
Data that already lives in spreadsheets
If your client data is exported from a CRM, insurance system, or internal database into Excel, the export feature bridges that workflow directly. You get the form’s field template, map your existing columns to it, and paste the data in – no reformatting into text prompts.
For spreadsheet-heavy teams, that can be the most natural input method. Instead of translating existing structured data into free-form instructions, you keep working in the same tabular format and align the data to the form’s field structure.
Reusable templates
You export once per form. After that, the spreadsheet becomes a template you reuse for every client and every case. Change the values in the rows, paste it in, fill the form. You don’t need to re-export unless the form’s field structure changes.
That template is useful even if your workflow stays mostly one by one. Many users do not process every form in batches. They still benefit from having a reusable worksheet that shows the exact fields for the forms they use most often.
Example: An insurance professional works with 6 forms regularly. She exports each one to Excel once. For each client, she opens the relevant template, fills in the 10-15 fields that apply, filters out empty columns, and pastes the result into Instafill.ai. The entire input step takes under a minute per form. She reuses the same template for every new client – only the data changes.
Batch filling
The exported spreadsheet uses the same format as Instafill.ai’s batch filling feature. This means the same file works for both single fills and batch processing – export once, use it either way.
That is a secondary advantage of the same structure. The spreadsheet is first useful as a way to understand the form, and then useful again as a ready-made template when you want to scale the same workflow across multiple records.
For batch filling, add multiple rows to the spreadsheet – one row per person or record. Upload the spreadsheet, and Instafill.ai generates a separate completed PDF for each row. Each row is processed independently, using only the values in that row. A 100-row spreadsheet produces 100 completed PDFs in roughly 2 minutes.
Why fields are columns, not rows
If you don’t work with Excel regularly, it helps to understand why the layout is structured this way. In this spreadsheet, each column is a field and each row is a record – one person, one case, one completed PDF. That structure lets you add as many records as you need simply by adding rows downward. Ten clients are 10 rows. A hundred clients are 100 rows. Each row becomes its own PDF.
This same layout also makes the file easier to use before batch work begins. When fields are columns, you can quickly scan left to right and see the structure of the form as a set of named inputs. That makes the spreadsheet useful not just for scale, but also for understanding what the form needs in the first place.
If the layout were flipped – fields as rows – adding more people would mean adding columns sideways. On a form with 100+ fields, that means a spreadsheet that grows horizontally without limit, where each new person is a new column at the far right. That quickly becomes unmanageable to read, edit, or share. Fields as columns means the spreadsheet scales naturally: one new row per record, readable left to right.
Previously, creating a batch spreadsheet required manually typing the field names as column headers or copy-pasting them one by one from the form preview. The export feature eliminates that setup step entirely. You get a template with every field name already in place – add your rows and upload.
Example: 10 clients need a beneficiary change on the same insurance form. Export the form fields to Excel. Fill in one row per client with only the fields that change – beneficiary name, relationship, percentage split. Upload to batch fill. Instafill.ai produces 10 completed PDFs, each with the correct client data. Fields left empty stay empty in the output.
For a full walkthrough of batch filling, see the step-by-step guide or the latest updates to batch filling, including free-form text input, PDF merge, and e-signing.
Availability
Exporting fields to Excel is now available to all users on paid plans. The button appears in the Quick actions panel on the form details page for any form with completed fine-tuning. No additional setup needed.
If you already use Instafill.ai for one-by-one form filling, this feature can improve that workflow immediately. If you also use batch filling, the same export becomes your template for scaling the process.
Questions about this feature or how it applies to your forms? Write to [email protected].