
Connecting n8n with Instafill.ai takes just a few minutes and adds automation to your document workflow. Instead of manually copying inputs from spreadsheets, CRMs, or emails into Instafill.ai and downloading results by hand, you can connect your data sources through n8n and let the process run automatically.
Once connected, every new input is sent to Instafill.ai to fill out your forms, and the completed PDFs are delivered back, handling both the input and the output without manual effort. In this guide, we’ll walk you step by step through importing the workflow, adding your API key, and adapting it to your own forms and data.
Why automation matters
Instafill.ai makes filling PDFs faster and reliable, but in some cases, users collect data in other places – webforms, CRMs, spreadsheets, emails, etc. The usual step is to copy this information into Instafill.ai, fill out the form, and download filled PDF. With n8n, the data moves directly from its source into Instafill.ai. The form is filled automatically, and the completed PDF is delivered back to the right place – whether that’s Google Drive, your CRM, or an email inbox.
What the example workflow does
To make this process simple, we’ve prepared a ready-to-use workflow you can import into n8n. It shows the correct sequence of steps for working with Instafill.ai through the API:
- Add a PDF form.
- Start a filling session with your input data.
- Wait until the fill is complete.
- Download the finished PDF.
On its own, the workflow runs a demo with a test form and placeholder input. The value is that it shows you the correct Instafill.ai flow – upload a form, send data, check status, and download the result. From there, you can replace the test form and input with your own. You can then connect the workflow to real triggers, like a new spreadsheet row, and real outputs, like saving a PDF to Google Drive.
This way, you don’t have to figure out headers, binary uploads, or status checks yourself – the example workflow already handles those details.
Step-by-step setup
🎥 Prefer a walkthrough? We’ve also recorded a video guide that shows the process:
Step 1 — Import the workflow
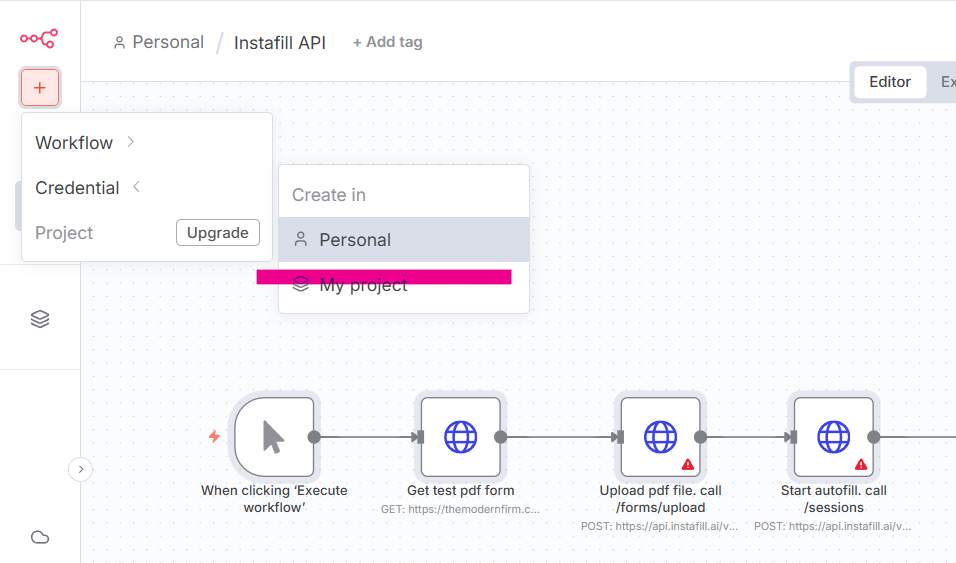
– Sign in to your n8n account, click Create Workflow → Import from File, and upload the JSON file. You can download it here: https://github.com/Instafill/public/blob/main/n8n-InstafillAPI.json.
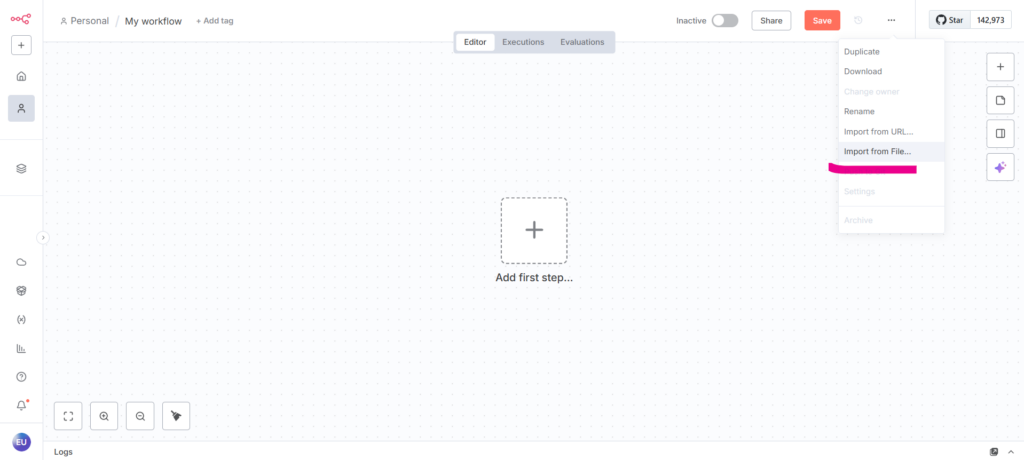
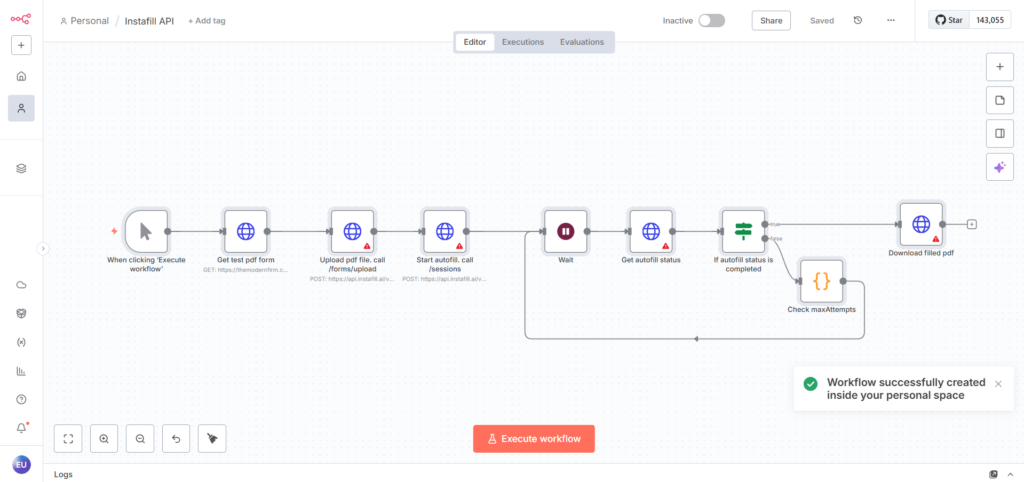
– You’ll see a set of connected nodes for uploading a PDF, starting a session, checking the status, and downloading the result:
Step 2 — Add your Instafill.ai API key
– Go to Credentials in the left menu:
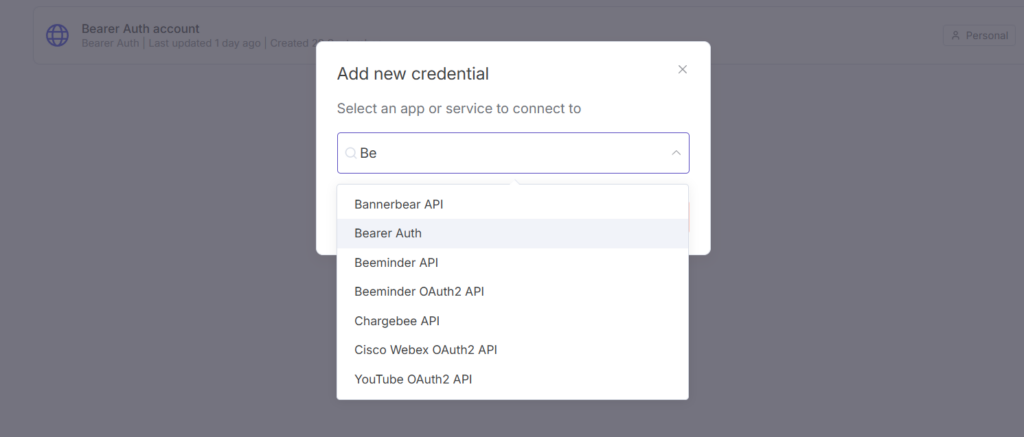
– Select Bearer Auth to create a new HTTP Bearer Auth credential:
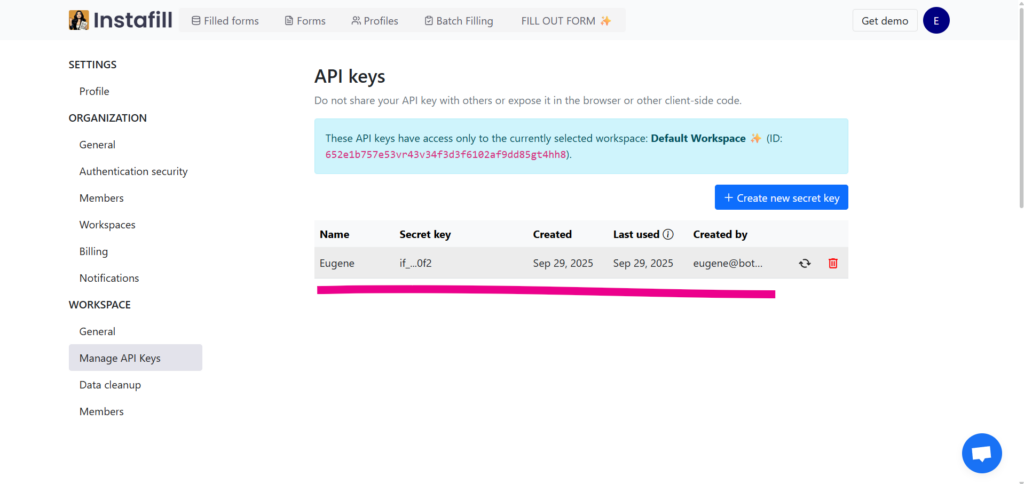
– Create a new Instafill.ai API key and paste it here. You can generate a key in your account settings: https://instafill.ai/settings/organization/api
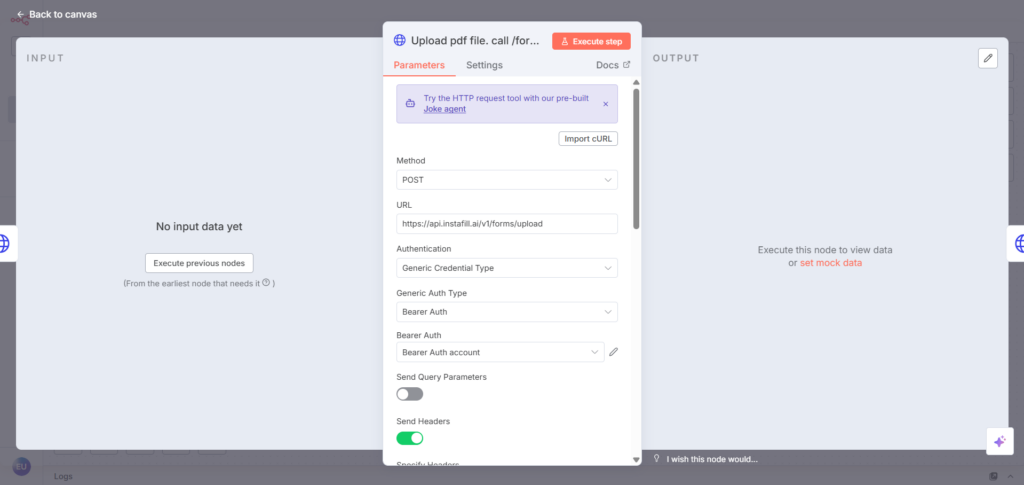
– Save the credential and assign it to all Instafill nodes in the workflow:

Step 3 — Link your credential and test the workflow
– Before executing the workflow, you need to attach your Instafill.ai API key to the right nodes:
– Simply opening each node and closing it is enough to apply the credential:
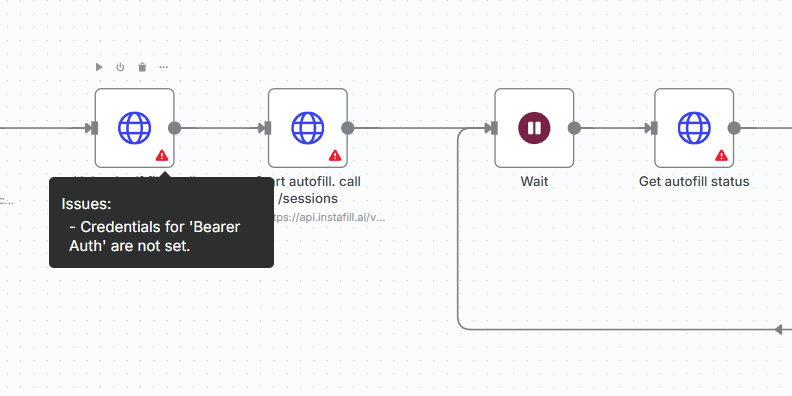
If you skip this step, you’ll see an error like “Credentials for Bearer Auth are not set”. Just open the node, and the workflow will be ready to run.

– Once the credential is linked, click Execute Workflow. The nodes will run one by one, and at the end you’ll see a filled PDF as output.

Step 4 — Use your own form
Right now, the workflow uses a sample form. To replace it with your own:
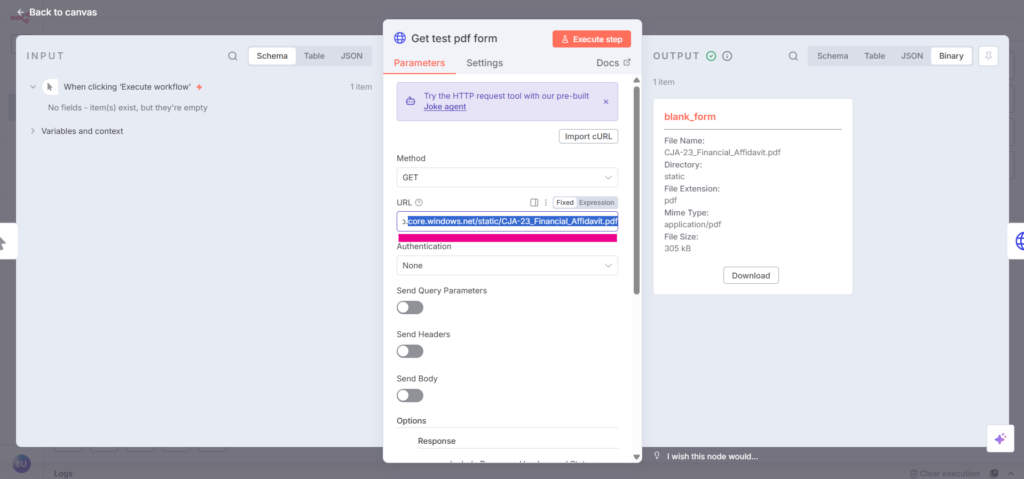
– Open the node called Get test pdf form. Replace the URL with your own and execute the step:
Step 5 — Use your own data
The template includes sample text, but this is the field where you enter your own input. Instafill.ai will take this input and fill out your PDF with it.
– Open the node called Start autofill:

– Replace the text in the Value field with your data. For example:
IN THE CASE OF: United States v. John Michael Rivera
PERSON REPRESENTED (Full Name): John Michael Rivera
CHARGE/OFFENSE: Felony – Wire Fraud
DOCKET NUMBERS:
Magistrate Judge: 24-MJ-1789
District Court: 24-CR-4521

EMPLOYMENT
Do you have a job? Yes
Monthly income: $3,200
Will you still have a job after this arrest? No
Income in past 12 months: $38,400
Sources: Salary from Rivera Logistics LLC
This text goes directly into the Value field under the text_info parameter. When you run the workflow, Instafill.ai uses it as the input to fill the PDF.

💡 In the example above, we entered the details for a financial affidavit manually, but the same field can also accept dynamic values from other services connected through n8n. That means instead of typing case details yourself, the data could come directly from a new row in Google Sheets, an Airtable record, a Salesforce lead, or even the body of an incoming email. Each time new data arrives, it flows automatically into Instafill.ai and generates a completed PDF – removing the need for any manual copy-paste.
Step 6 — Automate the trigger and output
Right now, the workflow only runs when you click Execute Workflow in n8n. That’s fine for testing, but in real use you’ll want it to run automatically. n8n gives you many ways to do this:
- Spreadsheet trigger — run the workflow whenever a new row is added to Google Sheets or Airtable.
- Webhook trigger — send data from any app that supports webhooks (for example, Cognito Forms, Typeform, or your own system).
- Email trigger — start the workflow whenever a message arrives in a specific inbox.
- CRM trigger — launch the workflow when a record changes in Salesforce, HubSpot, or another CRM.
On the output side, you can chain the workflow to:
- Save the completed PDF to Google Drive, OneDrive, or Dropbox.
- Send the PDF by email or Slack.
- Store it in SharePoint or another document system.
This means that once you’ve tested the template, you can adapt it to match your exact process: where the data comes from, and where the filled PDFs should go.
Real-world examples
The workflow template shows the basic flow – upload a form, send data, get back a filled PDF. But the real value comes when you adapt it to your own processes. Here are some common examples:
Law firms
A client intake form is submitted, n8n sends the data to Instafill.ai, and court forms are filled automatically. The PDFs can be emailed back or stored in the case system.
Lenders and financial services
A new loan application appears in the CRM. n8n triggers Instafill.ai to fill the required compliance forms, then saves the completed packet to SharePoint or Google Drive for review.
HR teams
Each time a new employee record is added to the HR system, Instafill.ai fills out onboarding forms (W-4, I-9, or local equivalents) automatically. The PDFs can be routed to the HR team’s shared folder without manual work.
Healthcare providers
Patient intake data from a webform or EHR system can be sent through n8n to Instafill.ai. The system fills the required compliance PDFs and stores them in the secure document archive.
Operations and logistics companies
Companies often reuse the same shipment or invoice data across multiple documents. With n8n, entering the data once (in Airtable, a spreadsheet, or even Slack) can automatically trigger Instafill.ai to generate the correct PDFs for clients or regulators.
By connecting n8n with Instafill.ai, PDF filling becomes a background step in your workflow. The example workflow is a starting point: replace the sample form and data, connect the right trigger, and decide where the completed PDFs should go. Once set up, it runs on its own — saving time and reducing errors every day.
This setup is valuable because it scales with your workflow. Instead of copying data by hand, you can let Instafill.ai handle the forms in the background – whether you’re a law firm generating court filings, a lender processing applications, or an HR team managing onboarding. Once built, the automation keeps running, saving time and reducing errors every day.
You can download the starter workflow here:
https://github.com/Instafill/public/blob/main/n8n-InstafillAPI.json
Try importing it into your n8n account today, run a test with your own form and data, and see the automation in action. Once you’ve confirmed it works, start adapting it – swap the trigger, swap the output, and make it your own.